Tags
burlap flowers, flags, grapevine wreath, July 4th decorating, lanterns, Mantel decorations, old frames

I bought the plate at a garage sale for $1.00!

A grapevine wreath!


I love my cotton stars!

30 Saturday Jun 2012
Posted in Uncategorized
Tags
burlap flowers, flags, grapevine wreath, July 4th decorating, lanterns, Mantel decorations, old frames
I bought the plate at a garage sale for $1.00!
A grapevine wreath!
I love my cotton stars!
29 Friday Jun 2012
Posted in Baking
Tags
7 minute frosting, browneyedbaker, buttercream frosting, Cupcakes, Dessert, espresso frosting, July 4th, mocha cupcake, picnic, snickerdoodle cupcake, vanilla cupcake
The last couple of weeks I have really been into making some good cupcakes. I happened upon this fantastic blog called, “Brown Eyed Baker”. Her moto…sweet, savory, simple…I just had to try some of her delectable looking cupcakes. I first made some melt in your mouth mocha cupcakes with espresso icing and snickerdoodle cupcakes with seven minute frosting for my friend’s birthday. They were delicious!

Snickerdoodle & Mocha Cupcakes
But today, I tried her vanilla cupcake with vanilla buttercream frosting. They were easy and quick to whip up and so moist and delicious! Here is the recipe…

red, white, and blue sprinkles make them perfect for that 4th of July picnic!
Vanilla Cupcakes
Yield: 12 cupcakes
Prep Time: 15 minutes | Bake Time: 20 to 24 minutes
1½ cups all-purpose flour 1 cup granulated sugar 1½ teaspoons baking powder ½ teaspoon table salt 8 tablespoons unsalted butter (1 stick), room temperature ½ cup sour cream 1 large egg , room temperature 2 large egg yolks , room temperature 1½ teaspoons vanilla extract
1. Adjust oven rack to middle position; heat oven to 350 degrees F. Line standard muffin/cupcake tin with paper or foil liners.
2. Whisk together flour, sugar, baking powder, and salt in bowl of standing mixer fitted with paddle attachment. Add butter, sour cream, egg and egg yolks, and vanilla; beat at medium speed until smooth and satiny, about 30 seconds. Scrape down sides of bowl with rubber spatula and mix by hand until smooth and no flour pockets remain.
3. Divide batter evenly among cups of prepared tin. Bake until cupcake tops are pale gold and toothpick or skewer inserted into center comes out clean, 20 to 24 minutes. Remove the cupcakes from tin and transfer to wire rack; cool cupcakes to room temperature before frosting.
Vanilla Buttercream Frosting
Yield: Enough to frost 12 cupcakes
Prep Time: 10 minutes
1 cup (8 ounces) unsalted butter, at room temperature 2½ cups powdered sugar 1 tablespoon vanilla extract
1. Using the wire whisk attachment of your stand mixer, whip the butter on medium-high speed for 5 minutes, stopping to scrape the bowl once or twice.
2. Reduce the speed to low and gradually add the powdered sugar. Once all of the powdered sugar is incorporated, increase the speed to medium-high and add the vanilla, mixing until incorporated. Whip at medium-high speed until light and fluffy, about 2 minutes, scraping the bowl as needed.
You can store any unused buttercream in the refrigerator in an airtight container; let it come to room temperature and then give it a quick whip in the mixer before using.
(Cupcake recipe adapted from Cook’s Illustrated; Frosting recipe is a Brown Eyed Baker original)
Happy graceful living!
28 Thursday Jun 2012
Posted in Baking
Tags
baking, best ever, chocolate chip cookies, cookies, Crisco, kitchen, Nestle chocolate chips, Pampered Chef baking stones
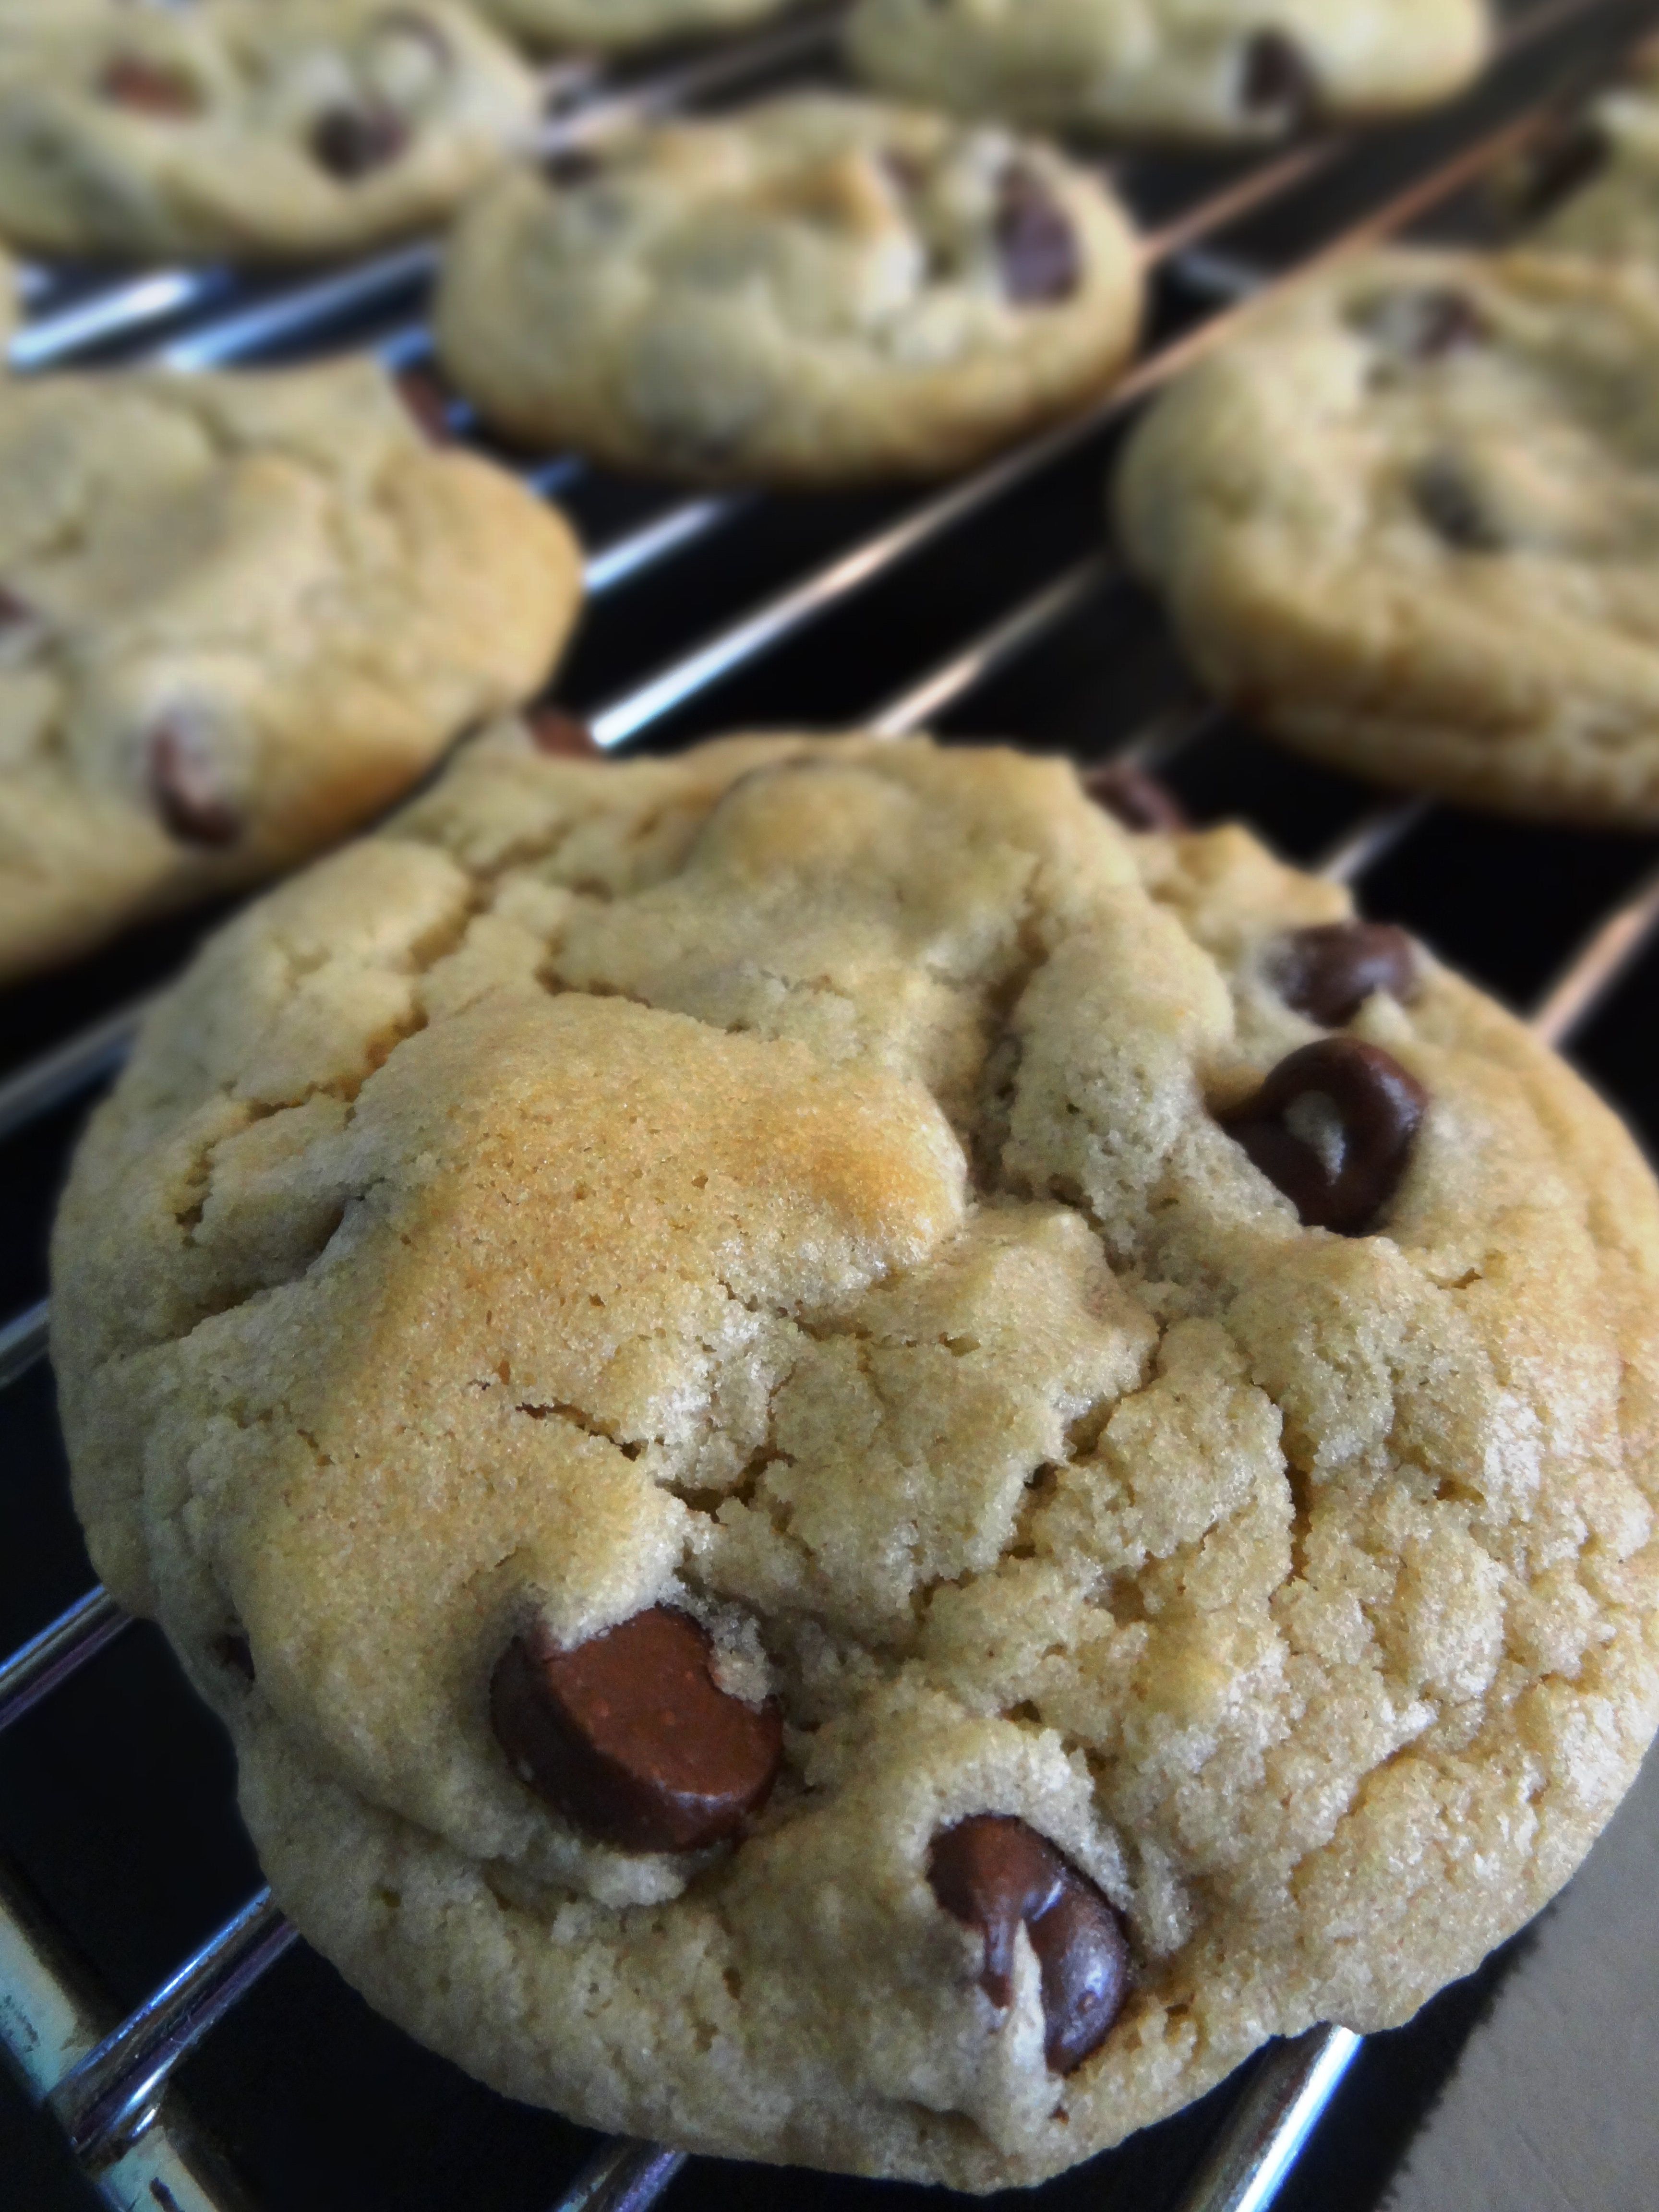
Everytime I give out my chocolate chip cookie recipe everyone always tells me it didn’t taste the same as mine and they didn’t look like my cookies. They always tease me questioning whether I left a step out or an ingredient. My chocolate chip cookie baking has been an ongoing process since the age of 17. It took me about twelve years to perfect my cookies and now I never look at the recipe. It’s like riding a bike…I never forget and it is perfection every time!
CHOCOLATE CHIP COOKIE RECIPE
DIRECTIONS

Enjoy these soft on the inside…crisp on the outside cookies!
Happy graceful living!
22 Wednesday Feb 2012
Posted in Vingettes
Tags
birds, flowers, nest, pussy willow, robin, robin eggs, Spring, spring vingette, vingette

The brilliant blue of the robin's egg...

The birds arise early to meet the dawn as they sing from bare branches...

I capture their beauty from afar as the rest beneath the pussy willow...

My touch of spring on a winter's day...
Happy graceful living!
13 Sunday Nov 2011
Posted in Christmas
I officially started to decorate my front porch for Christmas. It’s a gradual process and will not be finished until the day after Thanksgiving. So, pictures will come when I am done. But I do have a front porch to share with you from my first ever Holiday Open House. It is my friend Betty’s home and most of the items were for sale.


Happy graceful living!
11 Friday Nov 2011
Posted in Fall Decorating
Tags
apples, decorating, dining room table, gourds, pinecones, pumpkins, sorrento signature ware, table scape, Thanksgiving table, Waterford glass
In my previous post I showed you the table linens and the center piece. In today’s post I am going to expand the decorating to the place settings and additional fine tuning to make your table the perfect place to sit, eat, and visit.
I did decide to add a few more silk flowers to the center piece in the antique drawer. The large sunflowers seemed to do the trick by adding a little more color.

I then decided to put my Signature Sorrento Stoneware in three different colors as my plates for turkey day! The stoneware comes in five different colors. I have the gold, burgundy, and sage green…all great fall colors!

I pulled out all the stops with my Waterford crystal given to my husband and I from his mom, Ida, who I miss dearly! This will be our fourth Thanksgiving without her and the goblets are a special way to remember her on what was her favorite holiday to celebrate.

I cut some small silk flowers and tied them together with some jute and attached a small antique spool on which I wrote the name of the person who is to sit at that plate. I then ripped some muslin into strips and wrote with permanent marker…”give thanks”…and used it to tie the floral spray to the napkin.

I love the total look! I finished it off with the single tall candle, large pine cones, and small green apples scattered around the table.


Happy graceful living!
10 Thursday Nov 2011
Posted in Fall Decorating
I love to decorate my table for Thanksgiving and even though Turkey Day here in America is two weeks away, I couldn’t help but start having some fun with my dining room table.
I first started with layers of fabric in different textures. The bottom layer was some bridal lace topped with a nice long runner down the middle of the table in a darker shade of burlap. This was followed by weaving some homespun checked material and just plain white muslin. The different textures combined keep your eye moving. Oh by the way…all the material I purchased at JoAnn Fabrics for approximately $35.00!

Layered material with different textures
I have this big old drawer with beautiful knobs on it that I purchased for $12.00 at my favorite shop called, Meant to Be, in DeWitt, Iowa! I have used it for many things, but decided to use it as part of my tablescape this year with real gourds and pumpkins arranged inside of it and added some silk flowers to soften it up a bit. I love the result!

Simply LOVE the drawer!

Beautiful!

Happy graceful living!
18 Tuesday Oct 2011
Posted in Uncategorized


06 Thursday Oct 2011
Posted in Uncategorized
I have been busy working on some creative items for my first ever Holiday Open House! I’m so excited about these cute…classy…simple oranments…I had to share some pics with you!

Stamped Muslin!
Did you notice that old spool in the picture wrapped in some velvet ribbon and embellished with some beads! I’m not satisfied with the over all look of the ornament, but it’s a start and I will being tweaking it a bit!

A vintage look!
This is my favorite stamp on the muslin thus far. I don’t even know how I came up with this idea, but I love it! Just a stamp on muslin. The unfinished edges give it that sort of country/vintage feel. The sky is the limit when making these ornaments with the amount of stamps out there!

Great gift topper!
My friend Betty loves this ornament the most! The Holiday Open House will actually be at her home. She too is working on some special things!
Stay tuned the invitation will be posted soon!
Happy graceful living!
03 Monday Oct 2011
Posted in Fall Decorating
My pumpkin patch is in the front yard! They are not your typical pumpkins, but their sheer mystique offers a sort of ghost like quality.

Nylon pumpkins!
Yes…you read the caption…they are nylon pumpkins! The nylon is wrapped around a pumpkin shaped wire and attached solidly to a stick. I cut the sticks different lengths to get a better effect.

Look how transparent!
And no…I didn’t make these cute fellows. I bought them at a local nursery in my area called Esbenshades last fall. They have really held up well-being it is their second season outside!

Love the happy face on this one!
Happy graceful living!
